Pushing our Container to AWS ECR

In the first part of this blog series we saw how to create a local docker image containing a simple web server program. In order to run this server remotely, we have to upload this image somewhere to deploy it.
One service that lets us deploy docker images is Amazon Web Services (AWS). In this article, we're going to take the first step, and walk through the process of publishing our container image to the AWS Elastic Container Registry (ECR). Next time around, we'll see how to actually deploy our application using this image.
In principle, publishing the image is a simple task. But in my experience with AWS, the processes and documentation just aren't quite as clear as one would like them to be. There tend to be a lot of branches in their tutorials, and it's often not clear which path is the right path. The sheer amount of AWS-specific terminology can get extremely confusing, and this can make it hard to know if you've satisfied the prerequisites for the tutorial.
So in this article I'm going to be as explicit as possible, and include a video at the end so you can follow along. Here's the high level overview:
- Create an AWS account
- Create an ECR Repository
- Install the AWS Command Line Interface
- Login using the CLI
- Push the container using Docker
Create an AWS Account
First of course, you need to create an account with Amazon Web Services. This is a separate account from a normal Amazon account. But a massive gotcha is that you should not use the exact email address from your Amazon account. This can cause a weird loop preventing you from logging in successfully (see this Stack Overflow issue).
If you have Gmail though, it should work to use the '+' trick with email aliases. So you can have `name@gmail.comfor your Amazon account andname+aws@gmail.com` for your AWS account.
Create an ECR Repository
Next you'll need to login to your account on the web portal and create an ECR repository. To do this, you'll simply click the services tab and search for "Elastic Container Registry". Assuming you have no existing repositories, you'll be prompted with a description page of the service, and you'll want to find the "Get Started" button under the "Create a Repository" header off in the top right corner.

The only thing you need to do on the next page is to assign a name to the repository. The prefix of the repository will always have the format of {account-id}.dkr.ecr.{region}.amazonaws.com, where the account ID is a 12-digit number.
If you want, you can also set the repository as public, but my instructions will assume that you'd made a private repository. To finish up, you'll just click the "Create Repository" button at the bottom of the page. This part is also covered in the video at the bottom if you want to see it in action!
Install the AWS CLI
Our next few actions will happen on our local command line prompt. To interact with our AWS account, we'll need to install the AWS Command Line Interface. To install these tools, you can follow this user guide. It is fairly straightforward to follow once you select your operating system. You know it's succeeded when the command aws --version succeeds on your command line.
Login Using the CLI
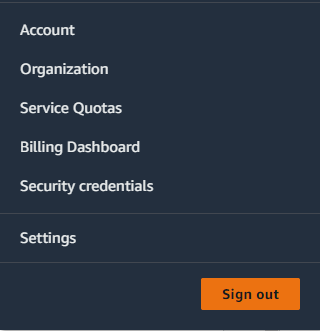
Now assuming you created a private repository, you'll need to authenticate on the command line. The first step in this process is to create an access key. You can do this from the web portal by clicking your account name in the top right corner to open up a menu and then going to the "Security Credentials" page. There's a section for "Access Keys" about midpage, and you'll want to use "Create Access Key".
If you do this as a "root" user, AWS will warn you that this is not the advised practice and you should instead create such keys as an "IAM User". But it is possible to do use root for demonstration purposes.
You'll want to copy the "Access Key ID" and the key itself. The latter must be copied or downloaded before you leave the page (you can't come back to it later).
You can then login using the aws configure command in your command line terminal. This will ask you to enter your access key ID and then the key itself, as well as the region.
Now that you're authenticated with AWS, we have to allow AWS to login to Docker for us. The following command would give us the Docker password for AWS in the us-west-2 region:
>> aws ecr get-login-password --region us-west-2We can pipe this password into the docker login command and connect to the repository we created with this command, where you should substitute your region and your account ID.
>> aws ecr get-login-password --region {region} | \
  docker login --username AWS --password-stdin {account-id}.dkr.ecr.{region}.amazonaws.com
Note how you actually do not need the repository name for this command! Just the prefix formed by your account and the region ID.
Pushing the Image
Now that we're authenticated, we just need to push the container image. We'll start by reminding ourselves of what our image ID is:
>> docker images
REPOSITORY TAG    IMAGE ID ...
quiz-server latest b9eab6a22b12 ...
The first thing we need to do is provide a "tag" for this image corresponding to the remote ECR repository we created. This requires the image ID and the full repository URI. We'll also attach :latest to indicate that this is the most recent push. Here's the specific command I used for my IDs:
>> docker tag b9eab6a22b12 165102442442.dkr.ecr.us-west-2.amazonaws.com/quiz-server:latestHere's a more generic command template:
>> docker tag {image-id} {account-id}.dkr.ecr.{region}.amazonaws.com/{repo-name}:latestFinally, we just need to push it using this new repository/tag combo! Here's what it looks like for me:
>> docker push 165102442442.dkr.ecr.us-west-2.amazonaws.com/quiz-server:latestAnd more generically:
>> docker push {account-id}.dkr.ecr.{region}.amazonaws.com/{repo-name}:latestYou should then be able to see your image if you head to your ECR dashboard!

Video Walkthrough
If you want to see all this in action, you can head to YouTube and take a look at the video walkthrough! If you are enjoying this series, make sure to subscribe to our monthly newsletter!