Adding a Database to our AWS Server

In the last few articles on the blog, we've been exploring how to launch a Haskell web server using AWS. Here are the steps we've done so far:
- Create a local Docker Image
- Upload the Docker Image to ECR
- Deploy your Server using Elastic Beanstalk
In this final part of the series, we're going to learn to attach a database to our application.
There are a few gotchas to this. Setting up the database for first time use is a bit tricky, because we have to do some initial migrations. Then we need to use environment variables to ensure it works both locally and on the remote server. Let's get started.
A Basic Schema
Let's first assume we have a super basic schema using the Persistent library. (If you want some details on how this works, see our Real World Haskell series). We'll just have one type in our database, and users will use server endpoints to create or fetch these "text entries".
import           Database.Persist.Sql
import qualified Database.Persist.TH as PTH
import           Data.Text (Text)

PTH.share [PTH.mkPersist PTH.sqlSettings, PTH.mkMigrate "migrateAll"] [PTH.persistLowerCase|

  TextEntry sql=text_entries
    text Text

|]
An important product of this template Haskell sequence is the migrateAll function, which will run the proper commands to migrate a Postgres database to fit our schema by creating tables.
Whenever we first create a database, we have to make sure it's migrated. But before we even do that we have to make sure we've created a database for Postgres to use! Let's see the commands we need for this, and how to run them in Haskell.
Running Setup Commands
When you install Postgres on your machine, you'll have separate "databases" on your system to help you keep your data separate. Separating data allows each database to have its own "users" table without having any name conflicts, for one example. By default, Postgresql comes installed with a database called postgres.
But we don't want to use this to store our data. We want to create a separate database. We want to create this database if it's the first time we're running the server with a database. But otherwise, we just want to make sure its migrations are up to date.
Now, the command we would run to create this database is simple:
CREATE DATABASE quiz;But we can first run this command to see if this database already exists:
SELECT datname FROM pg_database WHERE datname = 'quiz';Both these commands assume we are connected to the postgres database.
Since these first two instructions are raw commands, we can run them using the Postgresql Simple library. Here's some code to do this.
createDBIfMissing :: String -> IO ()
createDBIfMissing connString = do
  connection <- connectPostgreSQL (pack connString)
  putStrLn "Checking/Creating 'quiz' Database"
  let checkQuery = "SELECT datname FROM pg_database WHERE datname = 'quiz';"
  (checkResult :: [Only String]) <- query_ connection checkQuery
  when (null checkResult) $ do
    putStrLn "Not found! Creating 'quiz' database!"
    let createQuery = "CREATE DATABASE quiz;"
    void $ execute_ connection createQuery
When we run checkQuery, it sees if the quiz database exists. If its result is null, then we'll run the additional command to create our database.
Once we have this function, we can write a wrapper that will create the database and then migrate it for our schema. Here's what this wrapper looks like:
migrateDb :: String -> String -> IO ()
migrateDb baseConnString quizConnString = do
  createDBIfMissing baseConnString
  putStrLn "Migrating Database"
  runPG quizConnString (runMigration migrateAll)

runPG :: String -> SqlPersistT (LoggingT IO) a -> IO a
runPG connString action = runStdoutLoggingT $
  withPostgresqlConn (pack connString) $ \backend ->
    runReaderT action backend
Notice migrateDb takes two different connection strings. One is for the base (postgres) database. The other is for our new quiz database. The creation queries run on the first, the migration runs on the second.
But how do we use these functions within our server?
Loading the URI
When we kick off our server, we have to load the database URI for our Postgres database. We'll use the format of {host}:{port}. If you're running it locally, this would just be localhost:5432. But when we deploy the server, we'll use a different URI. So let's write a function to load the host and port (separated by a colon) from an environment variable named DATABASE_URI.
loadDatabaseEnv :: IO (String, String)
loadDatabaseEnv = do
  dbEnv <- lookupEnv "DATABASE_URI"
  if isNothing dbEnv || ':' `notElem` fromJust dbEnv
    then return ("localhost", "5432")
    else return (span (/= ':') (fromJust dbEnv))
Now we need to construct the full Postgres connection string. This has the following general format:
host={host} port={port} dbname={dbname} user={user} password={password}As a default value, you can often just have the username and password both be postgres (though of course this isn't recommended for a serious database). But let's make a function to substitute in the other values:
mkPostgresUri :: String -> String -> String -> String
mkPostgresUri host port dbname =
  "host='" <> host <> "' port=" <> tail port <> " dbname='" <> dbname <> "' user='postgres' password='postgres'"
Finally, we'll pull our different pieces together, get both URIs, and launch our server. In my example, I'm using a Servant server (more details on that in this article), and this will often require passing the database string as an argument.
server :: String -> Server QuizAPI
server connString = ...

runServer :: IO ()
runServer = do
  (host, port) <- loadDatabaseEnv
  let baseConnString = mkPostgresUri host port "postgres"
  let quizConnString = mkPostgresUri host port "quiz"
  migrateDb baseConnString quizConnString
  putStrLn "Running Server!"
  run 8080 (serve api (server quizConnString))
Having made all these modifications to our server, of course we have to rebuild and redeploy our docker image for that! We can create the new local image with:
docker build -t quiz-server .Then for more detailed instructions on deploying it, refer to part 2 and part 3 of this series!
When you deploy the server, you'll find it's crashing of course, because we haven't configured the database! So let's get to the real meat of this article…setting up the database on AWS!
Create a Database with RDS
This process is not actually too challenging. The first thing we're going to do is use RDS (Relational Database Service) to set up our database. This is easily done from the AWS console.
- Select the RDS service
- Hit the orange "Create Database" button
- Go through the creation wizard, making sure to select "Postgres" and the "Free Tier" option (assuming you're just making a test app).
Most of the default options are fine, but as I mentioned above I specified postgres for the username and password of the database. I also unchecked the box for "Performance Insights" since this could lead to additional billing charges if you forget to turn it off.

Once you've created your database, you can then click the "databases" link on the sidebar, and select your new database. On that screen, you'll be able to see the "endpoint" and "port" of your database. These are the values you'll need for your environment!
Add Environment Variable
To connect your environment to the database, now you just have to add an environment variable! To do this, you have to access the configuration from the web portal:
- Go to the Elastic Beanstalk service
- Select "Environments" from the sidebar and then click the environment you have running your server.
- Click on the "Configuration" link on the side, and then select the "Edit" button in the "Software" section.
- At the very bottom, you'll find the "Environment Properties" section. Fill in
DATABASE_URIas the key, and the{host}:{port}combination you got from your database in RDS. - Click "Apply" to make the change!

By adding an environment variable, you are changing the configuration of your server, so it will reboot. Once it relaunches, you should find that it works, and you can persist information from your database!
Conclusion
Hopefully this series has helped you learn how to deploy your Haskell code to AWS! If you'd like to see all this article in video form, you can check out our YouTube video covering these steps!
For more tips on creating a "Real World" application, you can read our series on web skills! You can also download our Haskell Production checklist for some ideas of other libraries and tools you can use to improve your Haskell!
Deploying a Haskell Server to AWS

In the last few articles, we've been talking about how to deploy a Haskell application using AWS. This is part 3 of the series. So if you haven't done parts 1 & 2, you should start there so you can follow along!
In Part 1, we wrote a Dockerfile and created a local Docker image containing a simple program for a Haskell web server.
In the Part 2, we pushed our container image to the AWS container registry (ECR). Notably, this involved creating an AWS account, downloading AWS command line tools and authenticating on the command line. We'll run a couple more of these commands today, so hopefully you're still authenticated!
But now that our container is uploaded, deploying that container is fairly straightforward. But it requires us to use a couple new concepts, as we'll see.
Adding ECR Permission
Before we get started, there's one step we have to take on the web portal. You need to give Elastic Beanstalk permission to download your ECR containers. You can do this using the IAM service from the AWS portal. Then follow these steps:
- Select "roles" on the left hand menu.
- Select "aws-elasticbeanstalk-ec2-role" in the list in the middle of the screen.
- Click "Add Permissions"
- Search for and select "AmazonEC2ContainerRegistryReadOnly"

Now let's get into the steps on our local machine.
Configuration File
There are multiple approaches to deploying a docker container, but the one that worked most easily for me was to create a file called Dockerrun.aws.json. (Full other methods, refer to the documentation). This approach involves a counter-intuitive idea. We're going to create a separate directory outside of our main project directory. We'll call it remote.
~/Quiz $ cd ..
~/ $ mkdir remote && cd remote
In this directory, we'll make a single file, called Dockerrun.aws.json. This will, of course, be a JSON file. It will be a very simple configuration file telling our application to use the docker image we pushed last time to ECR. We have to start it by specifying the version of the program (which is 1 because we're only using a single container).
{
  "AWSEBDockerrunVersion": "1",
  ...
}
Now we'll use tell it to use the Docker image we pushed last time by giving the URI under the Image object:
{
  "AWSEBDockerrunVersion": "1",
  "Image": {
    "Name": "165102442442.dkr.ecr.us-west-2.amazonaws.com/quiz-server"
  },
  ...
}
Finally, we'll specify the port, similar to a Dockerfile. We'll use 8080 both for the "Container" port and the "Host" port.
{
  "AWSEBDockerrunVersion": "1",
  "Image": {
    "Name": "165102442442.dkr.ecr.us-west-2.amazonaws.com/quiz-server"
  },
  "Ports": [{
    "ContainerPort": 8080,
    "HostPort": 8080
  }]
}
This is the only file we need in this directory! So now let's see what commands we need to run.
Creating the Application
Now we have two more steps that can largely be accomplished on the command line. First, we have to create an application. Then we have to create an environment to use for that application.
Before we can create an application though, we have to create a Git repository, just to store our single file! That's how AWS figures out what to push for configuration.
~/remote $ git init
~/remote $ git add .
~/remote $ git commit -m "First Commit"
Now we can create the application using the eb init command. We'll give our application the name quiz-server.
~/remote $ eb init -p docker quiz-serverYou can then see your application on the web portal by accessing the "Elastic Beanstalk" service and clicking the "Applications" tab on the left menu.

Creating the Environment
Now we have to deploy an environment to deploy for our application. When first creating this environment, we use the eb create command. We'll give this environment the name quiz-server-env.
~/remote $ eb create quiz-server-envThis will take a while to deploy. But once it's done, you should be able to see it by clicking the "Environments" tab from the previous screen in the web portal. This will also show you the URL you can use to access your server. It's now successfully deployed!

Debugging
Sometimes, your deployment might fail. For example, you might misspell the name of your container. If you click on your environment (from the "Environments" tab), then you'll be able to access the "Logs" on the left hand menu. This can help you debug.
If you need to change your configuration file, you'll need to commit it, though you don't need to push it to any remote repository. You instead use eb deploy to push your changes.
~/remote $ git add Dockerrun.aws.json
~/remote $ git commit -m "New Commit"
~/remote $ eb deploy
Now the deployment process should start again!
Video
You can also watch our YouTube video to see all these steps in action!
Conclusion
You now have enough information to deploy a Haskell web application to Heroku! We'll have one more installment in this series around adding a database to our application, so stay tuned for that! In the meantime, subscribe to our monthly newsletter so you can stay up to date with all the latest news!
Pushing our Container to AWS ECR

In the first part of this blog series we saw how to create a local docker image containing a simple web server program. In order to run this server remotely, we have to upload this image somewhere to deploy it.
One service that lets us deploy docker images is Amazon Web Services (AWS). In this article, we're going to take the first step, and walk through the process of publishing our container image to the AWS Elastic Container Registry (ECR). Next time around, we'll see how to actually deploy our application using this image.
In principle, publishing the image is a simple task. But in my experience with AWS, the processes and documentation just aren't quite as clear as one would like them to be. There tend to be a lot of branches in their tutorials, and it's often not clear which path is the right path. The sheer amount of AWS-specific terminology can get extremely confusing, and this can make it hard to know if you've satisfied the prerequisites for the tutorial.
So in this article I'm going to be as explicit as possible, and include a video at the end so you can follow along. Here's the high level overview:
- Create an AWS account
- Create an ECR Repository
- Install the AWS Command Line Interface
- Login using the CLI
- Push the container using Docker
Create an AWS Account
First of course, you need to create an account with Amazon Web Services. This is a separate account from a normal Amazon account. But a massive gotcha is that you should not use the exact email address from your Amazon account. This can cause a weird loop preventing you from logging in successfully (see this Stack Overflow issue).
If you have Gmail though, it should work to use the '+' trick with email aliases. So you can have `name@gmail.comfor your Amazon account andname+aws@gmail.com` for your AWS account.
Create an ECR Repository
Next you'll need to login to your account on the web portal and create an ECR repository. To do this, you'll simply click the services tab and search for "Elastic Container Registry". Assuming you have no existing repositories, you'll be prompted with a description page of the service, and you'll want to find the "Get Started" button under the "Create a Repository" header off in the top right corner.

The only thing you need to do on the next page is to assign a name to the repository. The prefix of the repository will always have the format of {account-id}.dkr.ecr.{region}.amazonaws.com, where the account ID is a 12-digit number.
If you want, you can also set the repository as public, but my instructions will assume that you'd made a private repository. To finish up, you'll just click the "Create Repository" button at the bottom of the page. This part is also covered in the video at the bottom if you want to see it in action!
Install the AWS CLI
Our next few actions will happen on our local command line prompt. To interact with our AWS account, we'll need to install the AWS Command Line Interface. To install these tools, you can follow this user guide. It is fairly straightforward to follow once you select your operating system. You know it's succeeded when the command aws --version succeeds on your command line.
Login Using the CLI
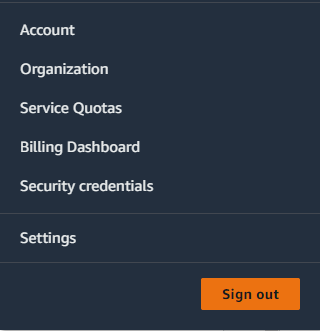
Now assuming you created a private repository, you'll need to authenticate on the command line. The first step in this process is to create an access key. You can do this from the web portal by clicking your account name in the top right corner to open up a menu and then going to the "Security Credentials" page. There's a section for "Access Keys" about midpage, and you'll want to use "Create Access Key".
If you do this as a "root" user, AWS will warn you that this is not the advised practice and you should instead create such keys as an "IAM User". But it is possible to do use root for demonstration purposes.
You'll want to copy the "Access Key ID" and the key itself. The latter must be copied or downloaded before you leave the page (you can't come back to it later).
You can then login using the aws configure command in your command line terminal. This will ask you to enter your access key ID and then the key itself, as well as the region.
Now that you're authenticated with AWS, we have to allow AWS to login to Docker for us. The following command would give us the Docker password for AWS in the us-west-2 region:
>> aws ecr get-login-password --region us-west-2We can pipe this password into the docker login command and connect to the repository we created with this command, where you should substitute your region and your account ID.
>> aws ecr get-login-password --region {region} | \
  docker login --username AWS --password-stdin {account-id}.dkr.ecr.{region}.amazonaws.com
Note how you actually do not need the repository name for this command! Just the prefix formed by your account and the region ID.
Pushing the Image
Now that we're authenticated, we just need to push the container image. We'll start by reminding ourselves of what our image ID is:
>> docker images
REPOSITORY TAG    IMAGE ID ...
quiz-server latest b9eab6a22b12 ...
The first thing we need to do is provide a "tag" for this image corresponding to the remote ECR repository we created. This requires the image ID and the full repository URI. We'll also attach :latest to indicate that this is the most recent push. Here's the specific command I used for my IDs:
>> docker tag b9eab6a22b12 165102442442.dkr.ecr.us-west-2.amazonaws.com/quiz-server:latestHere's a more generic command template:
>> docker tag {image-id} {account-id}.dkr.ecr.{region}.amazonaws.com/{repo-name}:latestFinally, we just need to push it using this new repository/tag combo! Here's what it looks like for me:
>> docker push 165102442442.dkr.ecr.us-west-2.amazonaws.com/quiz-server:latestAnd more generically:
>> docker push {account-id}.dkr.ecr.{region}.amazonaws.com/{repo-name}:latestYou should then be able to see your image if you head to your ECR dashboard!

Video Walkthrough
If you want to see all this in action, you can head to YouTube and take a look at the video walkthrough! If you are enjoying this series, make sure to subscribe to our monthly newsletter!
Creating a Local Docker Image

Running a web server locally is easy. Deploying it so other people can use your web application can be challenging. This is especially true with Haskell, since a lot of deployment platforms don't support Haskell natively (unlike say, Python or Javascript). In the past, I've used Heroku for deploying Haskell applications. In fact, in my Practical Haskell and Effectful Haskell courses I walk through how to launch a basic Haskell application on Heroku.
Unfortunately, Heroku recently took away its free tier, so I've been looking for other platforms that could potentially fill this gap for small projects. The starting point for a lot of alternatives though, is to use Docker containers. Generally speaking, Docker makes it easy to package your code into a container image that you can deploy in many different places.
So today, we're going to explore the basics of packing a simple Haskell application into such a container. As a note, this is different from building our project with stack using Docker. That's a subject for a different time. My next few articles will focus on eventually publishing and deploying our work.
Starting the Dockerfile
So for this article, we're going to assume we've already got a basic web server application that builds and runs locally on port 8080. The key step in enabling us to package this application for deployment with Docker is a Dockerfile.
The Dockerfile specifies how to set up the environment in which our code will operate. It can include instructions for downloading any dependencies (e.g. Stack or GHC), building our code from source, and running the necessary executable. Dockerfiles have a procedural format, where most of the functions have analogues to commands we would run on a terminal.
Doing all the setup work from scratch would be a little exhausting and error-prone. So the first step is often that we want to "inherit" from a container that someone else has published using the FROM command. In our case, we want to base our container off of one of the containers in the Official Haskell repository. We'll use one for GHC 9.2.5. So here is the first line we'll put in our Dockerfile:
FROM haskell:9.2.5Building the Code
Now we have to actually copy our code into the container and build it. We use the COPY command to copy everything from our project root (.) into the absolute path /app of the Docker container. Then we set this /app directory as our working directory with the WORKDIR command.
FROM haskell:9.2.5

COPY . /app
WORKDIR /app
Now we'll build our code. To run setup commands, we simply use the RUN descriptor followed by the command we want. We'll use 2-3 commands to build our Haskell code. First we use stack setup to download GHC onto the container, and then we build the dependencies for our code. Finally, we use the normal stack build command to build the source code for the application.
FROM haskell:9.2.5

...

RUN stack setup && stack build --only-dependencies
RUN stack build
Running the Application
We're almost done with the Dockerfile! We just need a couple more commands. First, since we are running a web server, we want to expose the port the server runs on. We do this with the EXPOSE command.
FROM haskell:9.2.5
...

EXPOSE 8080
Finally, we want to specify the command to run the server itself. Supposing our project's cabal file specifies the executable quiz-server, our normal command would be stack exec quiz-server. You might expect we would accomplish this with RUN stack exec quiz-server. However, we actually want to use CMD instead of RUN:
FROM haskell:9.2.5
...

CMD stack exec quiz-server
If we were to use RUN, then the command would be run while building the docker container. Since the command is a web server that listens indefinitely, this means the build step will never complete, and we'll never get our image! However, by using CMD, this command will happen when we run the container, not when we build the container.
Here's our final Dockerfile (which we have to save as "Dockerfile" in our project root directory):
FROM haskell:9.2.5

COPY . /app

WORKDIR /app

RUN stack setup && stack build --only-dependencies
RUN stack build

EXPOSE 8080
CMD stack exec quiz-server
Creating the Image
Once we have finished our Dockerfile, we still need to build it to create the image we can deploy elsewhere. To do this, you need to make sure you have Docker installed on your local system. Then you can use the docker build command to create a local image.
>> docker build -t quiz-server .You can then see the image you created with the docker images command!
>> docker images
REPOSITORY TAG    IMAGE ID ...
quiz-server latest abcdef123456 ...
If you want, you can then run your application locally with the docker run command! The key thing with a web server is that you have to use the -p argument to make sure that the exposed ports on the docker container are then re-exposed on your local machine. It's possible to use a different port locally, but for our purposes, we'll just use 8080 for both like so:
>> docker run -it -p 8080:8080 --rm quiz-serverConclusion
This creates a local docker image for us. But this isn't enough to run the program anywhere on the web! Next time we'll upload this image to a service to deploy our application to the internet!
If you want to keep up with this series, make sure to subscribe to our monthly newsletter!